B L O G G E R

--> This is JAN AUSTIN EVANGELISTA hir signing..

Installation Process of 2 Open Source OS

Linux OS (GENTOO)


Gentoo Linux


1. Introduction

This guide is based on an example with two IDE hard disks. It means that you will more than likely need to change the drive, partition names and partition sizes to match your own setup and needs.

Warning: This document is not intended to be an LVM2 tutorial. It serves as a supplement to the Gentoo installation procedure as described in the Handbook, Part 1. Make sure you read the Gentoo Installation Manual before you start your installation process.

Note: For a complete LVM HOWTO point your browser to http://tldp.org/HOWTO/LVM-HOWTO


Initial requirements

If you do a fresh install of Gentoo, you will need to use a bootable CD with LVM2 support such as a Gentoo Installation CD. You can find the Installation CDs for an x86 architecture on our mirrors under /releases/x86/current/installcd. Other architectures might be supported as well.

If you install LVM2 on a currently running system with some spare hard disk space, you will need to enable the LVM2 module (dm-mod). This module is available in gentoo-sources. Compiling your kernel and getting LVM2 to work is covered later in this guide.

Not all 2.4 kernels provided by Gentoo support LVM2!

Partitions

Our example system has two IDE hard disks and will be partitioned as follows:

  • /dev/hda1 -- /boot
  • /dev/hda2 -- (swap)
  • /dev/hda3 -- /
  • /dev/hda4 -- Will be used by LVM2
  • /dev/hdb1 -- Will be used by LVM2

    Important: Pay attention to the partition names as it is easy to confuse the a's and b's, and the partition numbers. One false move could wipe out the wrong partition. You have been warned!

    OK, time to start...

2. Installation

Follow the handbook, but with the following amendments to chapter 4. Preparing the Disks:

Use fdisk as described in the handbook, but use the partition scheme mentioned above as an example. It is only an example, adapt it to your own needs.

Create a small physical /boot partition (hda1). In this example, /boot will be not managed by LVM2. This partition will contain your bootloader and your kernel(s). A 64MB partition should be well enough for quite a few kernel generations.

Create a swap partition (hda2).

Create a / (root) partition (hda3). If you are interested in trying to put your root partition under LVM management (which we do not recommend), see the resources section at the end of this guide for a link to a mini-howto on how to do this. The size of the root partition need not be large if you will keep /opt /usr /home /var and /tmp in an LVM2 Volume Group (vg). In this case, 1GB should be sufficient.

Note: It is not recommended to put the following directories in an LVM2 partition: /etc, /lib, /mnt, /proc, /sbin, /dev, and /root. This way, you would still be able to log into your system (crippled, but still somewhat usable, as root) if something goes terribly wrong.

Assuming the /boot, swap and root partitions do not use the whole physical disk, create a fourth partition on this disk and set it to type 8e (Linux LVM). If you have more physical drives you would like to use with LVM, create one partition on each and give them the same type (8e).

Note: Considering the huge size of current disks, you might consider splitting your hard disks into smaller partitions instead of creating a big partition that will be added to an LVM2 volume group in one block. LVM2 makes it easy to extend your volumes after all. This leaves you some unallocated partitions you might need to use outside of an LVM2 group. In short, don't use your disk space until you know you need it. As an example, one contributor had split his 160 Gb hard disk into 8 partitions of 20 Gb each.


Create the filesystems on /dev/hda1 and /dev/hda3, and create and activate the swap on /dev/hda2 as described in the handbook.

Load the LVM2 dm-mod module.

Code Listing 2.1: Loading the LVM2 module

# modprobe dm-mod

Before scanning and activating LVM, you might want to edit /etc/lvm/lvm.conf to exclude some devices. By default, LVM2 will scan all devices, even your CDROM which can generate error messages. In the following example, the line that allows scanning of all devices is replaced by one that rejects every device but our two IDE disks.

Code Listing 2.2: Activating LVM

(Avoid scanning all devices but our disks)
# nano -w /etc/lvm/lvm.conf
(Look for the following line)
filter = [ "a/.*/" ]
(Replace it with the following one to scan
/dev/hda and /dev/hdb and reject anything else)

filter = [ "a/dev/hd[ab]", "r/.*/" ]
(Save the file and quit nano)
# vgscan
Reading all physical volumes. This may take a while...
No volume groups found
(Make any previously set up volume groups available)
# vgchange -a y

Prepare the partitions.

Code Listing 2.3: Preparing the partitions

# pvcreate /dev/hda4 /dev/hdb1
No physical volume label read from /dev/hda4
Physical volume "/dev/hda4" successfully created
No physical volume label read from /dev/hdb1
Physical volume "/dev/hdb1" successfully created

Setup a volume group. A volume group is the result of combining several physical units into a single logical device.

In our example, /dev/hda1, /dev/hda2 and /dev/hda3 are the /boot, swap and root partitions so we need to combine /dev/hda4 and /dev/hdb1. It can be done with a single command, but, as an example, we will create our volume group and extend it.

Code Listing 2.4: Creating and extending a volume group

(Create a volume group named vg)
# vgcreate vg /dev/hda4
/etc/lvm/backup: fsync failed: Invalid argument (Ignore this warning)
Volume group "vg" successfully created
(Extending an existing volume group)
# vgextend vg /dev/hdb1
/etc/lvm/backup: fsync failed: Invalid argument (Ignore this warning,
again and later as well) Volume group "vg" successfully extended

Create the logical volumes. Logical volumes are the equivalent of partitions you would create using fdisk in a non LVM2 environment. In our example, we create the following partitions:

DirectorySize
/usr10 GB
/home5 GB
/opt5 GB
/var10 GB
/tmp2 GB

Since we are going to use LVM2, we should not worry too much about partition sizes because they can always be expanded as needed.

Note: As Terje Kvernes commented, it is easier to increase the size of a partition then to shrink it. You might therefore want to start with smaller partitions and increase their size as needed.

Code Listing 2.5: Creating and extending logical volumes

# lvcreate -L10G -nusr  vg
Logical volume "usr" created (Further similar messages not displayed)
# lvcreate -L5G -nhome vg
# lvcreate -L5G -nopt vg
# lvcreate -L10G -nvar vg
# lvcreate -L2G -ntmp vg
(As an example, let's extend a logical volume with 5 extra Gbytes)
# lvextend -L+5G /dev/vg/home

Create filesystems on the logical volumes the same way you would on a regular partition. We use ext3 on the logical volumes but any filesystem of your choice will work:

Code Listing 2.6: Creating the filesystems

# mke2fs -j /dev/vg/usr
# mke2fs -j /dev/vg/home
# mke2fs -j /dev/vg/opt
# mke2fs -j /dev/vg/var
# mke2fs -j /dev/vg/tmp

Mount your partitions as described in the handbook and mount your LVM2 logical volumes as if they were partitions. Replace the usual /dev/hdxx with /dev/vg/logical_volumename.

Code Listing 2.7: Mounting your logical volumes

(Make sure you have mounted your root partition as described in the 
handbook first)
# mkdir /mnt/gentoo/usr
# mount /dev/vg/usr /mnt/gentoo/usr
# mkdir /mnt/gentoo/home
# mount /dev/vg/home /mnt/gentoo/home
# mkdir /mnt/gentoo/opt
# mount /dev/vg/opt /mnt/gentoo/opt
# mkdir /mnt/gentoo/var
# mount /dev/vg/var /mnt/gentoo/var
# mkdir /mnt/gentoo/tmp
# mount /dev/vg/tmp /mnt/gentoo/tmp

Note: The rest of the installation handbook is mostly unchanged so we shall not walk you through it again except to point out differences.

When configuring your kernel, make sure to configure your kernel to support LVM2 (not all 2.4 kernels do). Select the LVM2 module as follows:

Code Listing 2.8: Selecting the LVM2 module in a 2.4.x kernel

Multi-device support (RAID and LVM)  --->
[*] Multiple devices driver support (RAID and LVM)
< > RAID support
(Note that LVM is not selected on purpose, this was for LVM1)
< > Logical volume manager (LVM) support
Device-mapper support
< > Mirror (RAID-1) support

Code Listing 2.9: Selecting the LVM2 module in a 2.6.x kernel

Device Drivers  --->
Multi-device support (RAID and LVM) --->
[*] Multiple devices driver support (RAID and LVM)
< > RAID support
Device mapper support

The compiled module is called dm-mod.ko

After you have built your kernel and installed its modules, add the following line to your /etc/modules.autoload.d/kernel-{KV} where {KV} represents your kernel version (2.4 or 2.6) so that the LVM2 module gets loaded when your machine is booted:

Code Listing 2.10: Adding the LVM2 module into /etc/modules.autoload.d/kernel-2.6

# nano -w /etc/modules.autoload.d/kernel-2.6
(Add the following line)
dm-mod

Now, install the lvm2 package.

Important: Make sure your /usr/src/linux link points to the kernel sources you are using because the lvm2 ebuild depends on the device-mapper ebuild which will check the presence of a required source file under /usr/src/linux/include/linux.

Code Listing 2.11: Emerging the LVM2 package

# emerge lvm2

Edit /etc/lvm/lvm.conf as described earlier. The file you previously edited is part of your installation environment and will disappear after the next reboot. This time, you edit the real one inside your new Gentoo install.

When editing your /etc/fstab file, follow the handbook and add your LVM2 logical volumes as needed. Again, here are a few lines needed for our example:

Code Listing 2.12: Extract of /etc/fstab

/dev/hda1     /boot   ext3    noauto,noatime 1 2
/dev/hda2 none swap sw 0 0
/dev/hda3 / ext3 noatime 0 1
# Logical volumes
/dev/vg/usr /usr ext3 noatime 0 2
/dev/vg/home /home ext3 noatime 0 2
/dev/vg/opt /opt ext3 noatime 0 2
/dev/vg/var /var ext3 noatime 0 2
/dev/vg/tmp /tmp ext3 noatime 0 2

When you reach the end of the installation part of the handbook, don't forget to umount all your LVM2 logical volumes as well and for a good measure run the following command before you reboot:

Code Listing 2.13: Shutting down LVM2

# vgchange -a n

Restart your machine and all partitions should be visible and mounted.

3. Continuing After a Reboot

If you have interrupted the Gentoo installation at one point and want to continue, you need to create the volume device nodes first:

Code Listing 3.1: Reactivating the volumes

# vgscan --mknodes

Installation CDs with less recent tools might need to reactivate the volumes instead:

Code Listing 3.2: Reactivating the volumes

(Deactivate all volumes first)
# vgchange -a n
(Export all the volumes)
# vgexport -a vg
(Import all volumes)
# vgimport -a vg
(Reactivate all volumes)
# vgchange -a y

4. Resources

5. Acknowledgements

Thanks Thilo Bangert and Terje Kvernes for their help and comments on this document.

<<---------------------------->>


Linux OS (UBUNTU)


Ubuntu Linux


GET UBUNTU

To get Ubuntu, click on the following link:
http://www.ubuntu.com/getubuntu/download

For this installation I recommend you simply choose the Desktop Edition of Ubuntu.

Start now by selecting the closest location to you in the dropdown.
Scroll down and ensure 32bit version is selected.
Select Begin Download.
Once finished, locate the downloaded file; it will be named something similar to
ubuntu-9.04-desktop-i386.iso

To create a bootable disk from the .iso, you may wish to use the useful tool named Burn. Go to the following link to get this tool, or simply choose a burner of your preference:
http://burn-osx.sourceforge.net/Pages/English/home.html

No, you do NOT have to use this tool, but it has several advantages and I include it in the process simply as an example of the ISO burning process. The nice thing about Burn is that you simply download, install, and open. PLUS, often the biggest issue with an install is an improperly burned ISO, and this tool helped me get quick and correct burns each time.

In Burn, go to the copy tab as shown below:


Now just Drag the .iso file you downloaded to where it says, "Drop discs and images here."

Insert a blank cd.
Select Burn.
Ensure Maximum possible is selected.
Select Burn.
Once complete, this is the Ubuntu Linux boot disk you will need for the next steps.


DOWNLOAD VIRTUALBOX
Virtual box is a fantastic and enterprise capable virtualizer for Mac hardware. For those not familiar with virtualizers, this tool allows you to install Ubuntu in a shared manner with another Operating System such as MacOS or Windows.

You may wish to find out more about this SUN Microsystem's tool, as it is very useful for many virtualizing scenerios. Best of all, it is one of the only virtualization tools that is also Open Source Software.

To get VirtualBox simply go to this link:
http://www.virtualbox.org/wiki/Downloads

Under VirtualBox Binaries, where it says VirtualBox 3.0.0 for OS X hosts, select "Intel Macs"
Open the VirtualBox disk image and run the installer

ADVANCED TIP: If you're a more advanced user, it's important to let you know that rather than burning the ISO to CDROM, then using the CD to install into Virtualbox, the CDROM drive in virtual box can be configured to point at the ISO file, eliminating the need to burn a disk.


START THE INSTALLATION

When you're ready, open VirtualBox from the Applications folder on your Mac.

Begin the following series of steps:

Register (optional)
Select the "New" icon in the toolbar.


A new window will open.

Select Next.
Enter a Name for the virtual machine e.g. Ubuntu Linux.
Change Operating System to Linux.
Change Version to Ubuntu.

Obviously you can apply this method to other Linux flavours if you wish.

Select Next.
Select amount of RAM to be used on the virtual machine.
(384 recommended, I recommend 512 if you have 1GB RAM on your Mac).

Select Next.
Ensure Boot Hard Disk (Primary Master) is selected.
Select "Create new hard disk."

Now you need to again Select Next and once more Select Next.

Choose "Dynamically expanding storage" ("Fixed-size storage" creates a fixed hard drive for Ubuntu, but "Dynamically expanding storage" only uses as much hard drive space as it needs to install and will thereafter expand as needed).
Select Next.

The Name you chose for the Virtual Machine earlier should now show under Location; if not then enter the same name as before under Location e.g. Ubuntu Linux, and select the amount of maximum space that the hard drive can use.

TIP: This will automatically be something like 8 GB but you can change it depending on your requirements. Or just leave it as it is and move on.

Select Next.
Now Select Finish.
Finally Select Finish once more.

You should now see something similar to this:


When you're ready, please press the "Start" icon at the top.

Now start this process:
Select OK.
Select Next.
Ensure CD/DVD-ROM Device and Host Drive are selected (should be the default).
Select Next.
Insert previously created Ubuntu Linux bootable disk.
Select Finish.

At this point the disk will start booting.

Select English or your preferred language.

If a screen appears regarding the mouse or keyboard, take note of the host key; something like the Left Command key (also shown at the bottom right of the VirtualBox window). This is important so please don't forget what it indicates.
Now select the checkbox "Don't show this message again" and select Capture (This will make the mouse change automatically when you select the virtual system.)

Select Install Ubuntu.

At this point you should get the following loading screen, which is Ubuntu starting:


INITIAL UBUNTU SETUP
Once finished loading (this may take a few minutes), ensure your language is selected once again on the left panel and select Forward.

Select your Time Zone on the map or by your region and city.
Select Forward.
Choose keyboard layout depending on the type of keyboard you have (to test, simply type digits into the typing box, ensuring that it enters the correct digits as on your keyboard).
Select Forward.
Choose "Use the entire disk."
Select Forward.
Fill in your name, account username, password (minimum eight digits recommended), and computer name for network visibility.
Choose whether to log in automatically or require a password to log in.
(I recommend that you do require a password, just take note of what you choose).
Select Forward.
Now, please Select Install.

It should show the following installing system box with a status on the installation.

Be patient, as this is nearly the final step, but unfortunately takes time. It can take anywhere from 10 minutes to an hour to install, depending on your system. Look at it this way, now is a perfect time to grab a tasty snack, sit back and enjoy an episode of your favourite TV show.

You can check on the status of the installation, as shown below:


When completed, please Select Restart Now (you should not restart the Mac itself, the VirtualBox will merely restart Ubuntu for you within the program).

It will say on the Ubuntu restart "Please remove the disc, close the tray (if any) and press ENTER to continue"; when this happens, the eject button in OS X will not work therefore in the VirtualBox window, select Devices (on the top toolbar in OS X).


Select Unmount CD/DVD-ROM and press ENTER.
Now you will be able to eject the disk from the computer.

Enter your Username and Password (the one you should have noted earlier!).

TIP: If you need more details with regard to Users and user privileges in Ubuntu, you may wish to review this article:
http://www.reallylinux.com/docs/usersubuntu.shtml

Ubuntu will open and the Update Manager should automatically open (if not, it can be found in System/Administration).
Select Install Updates (this may take a while depending on your internet speed).

OUTSTANDING!You should now have a virtual machine Ubuntu running inside OS X.

(Optional to increase graphics performance)
Whilst in Ubuntu,
Select Devices at the top of the screen again
Select Install Guest Additions
This will open on your Ubuntu desktop as something similar to VBOXADDITIONS_3.0.0_49315
Double click it to open
Double click autorun.sh
Select Run
Enter your password
It will open a terminal window and may take a couple of minutes to complete
Once finished, it will say, "Successfully installed the VirtualBox Guest Additions."
Press ENTER
Restart Ubuntu
Go to System/Preferences/Display to customize the screen size.

CONGRATUALTIONS and I give you a hearty welcome to Linux!
For further help with Linux, look over the list of the other articles here on the reallylinux.com website, as there are plenty more beginner articles to get you started.

TROUBLESHOOTING

The process is fairly straightforward, but in case you encounter an issue, I try to provide some tips for the more common anomalies.

If you get this message,


Select "Do not show this message again" and select OK

To change the mouse back and forth simply click the Linux window to use Linux. To change back to Mac OS X, press the host key once (as indicated at the bottom right of the Linux window)

If you get a black screen on the Linux window, simply double click to restore session.

Note: to close VirtualBox, in the open Ubuntu window, select your name on the menubar and select shutdown; when it says Aborted or Powered Off under your Ubuntu Linux boot in the VirtualBox program, it is safe to close VirtualBox. To run in the future, simply open VirtualBox, select your operating system e.g. Ubuntu Linux and select Start


or


If the installation fails for some reason or another, select the operating system name, while in VirtualBox, and then select Discard. Unfortunately, if a complete fail occurs, you will need to restart the installation process. Make sure your ISO burn is correct.

You may also wish to review the article
Exploring Linux with Ubuntu.
Installation Process of 2 Windows OS

Windows 2000


Windows 2000

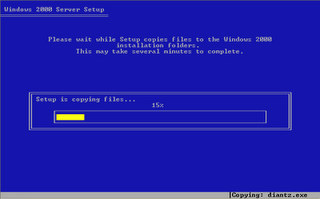
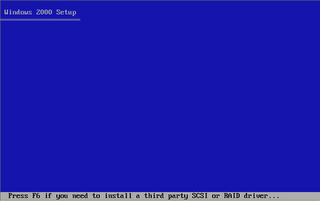
The text-based portion of the Setup program
The setup process begins loading a blue-looking text screen (not GUI). In that phase you will be asked to accept the EULA and choose a partition on which to install W2K, and if that partition is new, you'll be asked to format it by using either FAT, FAT32 or NTFS.
Start the computer from the CD.
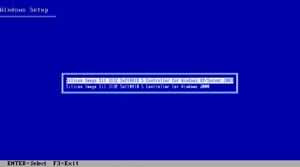
You can press F6 if you need to install additional SCSI adapters or other mass-storage devices. If you do you will be asked to supply a floppy disk with the drivers and you CANNOT browse it (or a CD for that matter). Make sure you have one handy.


Setup will load all the needed files and drivers.
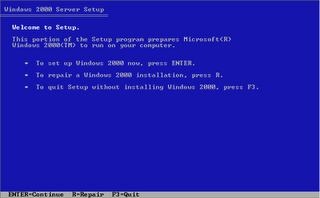
Select To Setup W2K Now. If you want, and if you have a previous installation of the OS, you can try to fix it by pressing R. If not, just press ENTER.


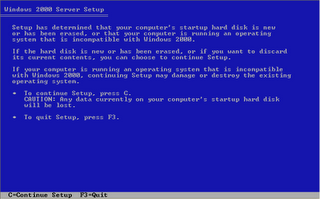
In case your server is a new one, or it is using a new hard disk that hasn't been partitioned yet, you'll get a warning message. Read it, and if you want to continue, press C.


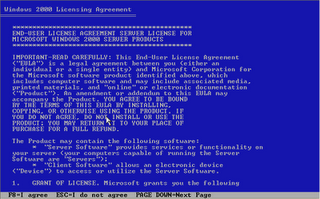
Read and accept the licensing agreement and press F8 if you accept it.


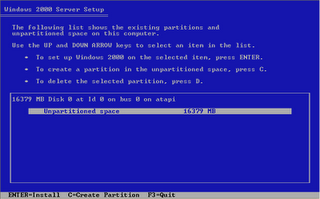
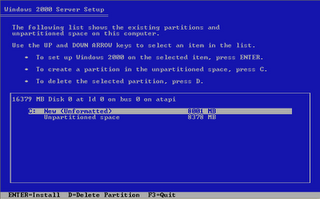
Select or create the partition on which you will install W2K. Depending upon your existing disk configuration choose one of the following:
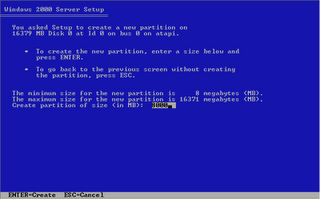
If the hard disk is not yet partitioned, you can create and size the partition on which you will install Windows 2000. Press C.


If the hard disk is new and you want to create a partition that will span the entire hard disk's size - press Enter.
Other optionsL
If the hard disk is already partitioned, but has enough unpartitioned disk space, you can create an additional partition in the unpartitioned space.
If the hard disk already has a partition that is large enough, you can install Windows 2000 on that partition. If the partition has an existing operating system, you will overwrite that operating system if you accept the default installation path. However, files other than the operating system files, such as program files and data files, will not be overwritten.
If the hard disk has an existing partition, you can delete it to create more unpartitioned space for the new partition. Deleting an existing partition erases all data on that partition.
If you select a new partition during Setup, create and size only the partition on which you will install Windows 2000. After installation, use Disk Management to partition the remaining space on the hard disk.
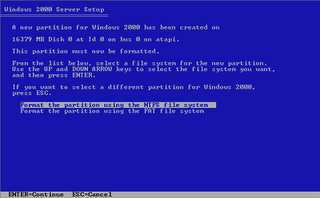
Select a file system for the installation partition. After you create the partition on which you will install W2K, you can use Setup to select the file system with which to format the partition. W2K supports the NTFS file system in addition to the file allocation table (FAT) and FAT32 file systems. Windows Server 2003, Windows XP Professional, Windows 2000, and Windows NT are the only Microsoft operating systems that you can use to gain access to data on a local hard disk that is formatted with NTFS. If you plan to gain access to files that are on a local W2K partition with the Microsoft Windows 95 or Windows 98 operating systems, you should format the partition with a FAT or FAT32 file system. We will use NTFS.


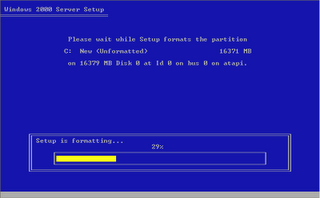
Setup will then begin copying necessary files from the installation point (CD, local I386 or network share).
Note: If you began the installation process from an MS-DOS floppy, make sure you have and run SMARTDRV from the floppy, otherwise the copying process will probably last more than an hour, perhaps even more. With SMARTDRV (or if setup was run by booting from CD) the copying will probably last a few minutes, no more than 5 max.


The computer will restart in graphical mode, and the installation will continue.

The GUI-based portion of the Setup program
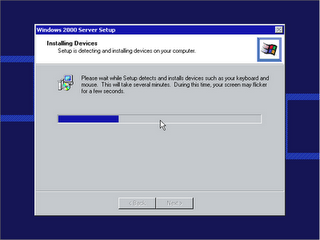
The setup process reboots and loads a GUI mode phase.
It will then begin to load device drivers based upon what it finds on your computer. You don't need to do anything at this stage.


If your computer stops responding during this phase (the progress bar is stuck almost half-way, and there is no disk activity) - shut down your computer and begin removing hardware such as PCI and ISA cards. If it works for you then later try to figure out how to make that specific piece of hardware work (it's probably not in the HCL).
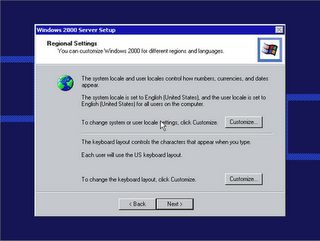
Click Customize to change regional settings, if necessary.
Current System Locale - Affects how programs display dates, times, currency, and numbers. Choose the locale that matches your location, for example, French (Canada).
Current Keyboard Layout - Accommodates the special characters and symbols used in different languages. Your keyboard layout determines which characters appear when you press keys on the keyboard.
If you don't need to make any changes just press Next.


If you do need to make changes press Customize and add your System Locale etc.
Note for Hebrew users: In W2K it is NOT SAFE to install Hebrew language support at this phase!!! Trust me, do it later. If you don't listen to me, good chances are that you'll get ???? fonts in some Office applications such as Outlook and others.
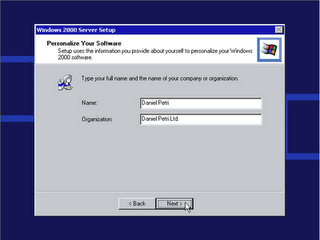
Type your name and organization.


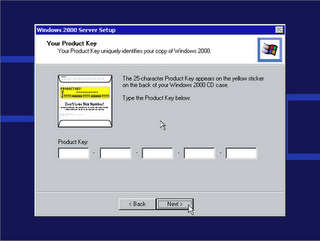
Type the product key


If you'd like to skip this step in the future, please read
Install Windows 2000 Without Supplying the CD Key.

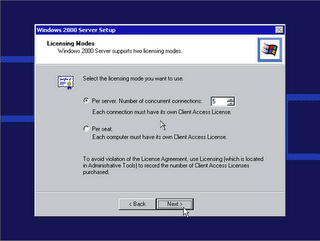
Enter the appropriate license type and number of purchased licenses.


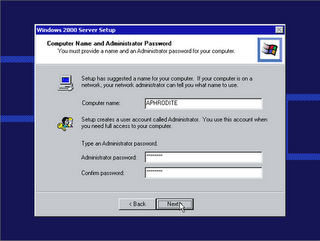
Type the computer name and a password for the local Administrator account. The local Administrator account resides in the SAM of the computer, not in Active Directory. If you will be installing in a domain, you need either a pre-assigned computer name for which a domain account has been created, or the right to create a computer account within the domain.


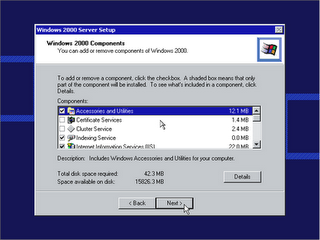
Choose which components to install or remove from the system.


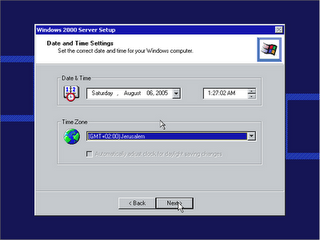
Select the date, time, and time zone settings.


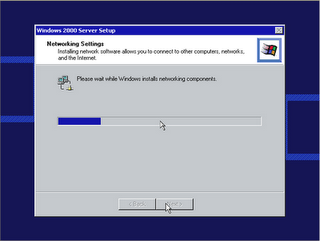
Setup will now install the networking components.
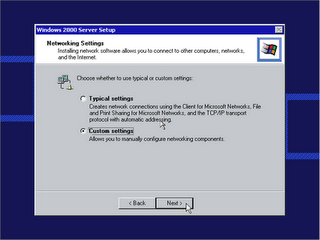
After a few seconds you will receive the Networking Settings window. BTW, if you have a NIC that is not in the HCL (see the
What's the HCL? page) and W2K cannot detect it, or if you don't have a NIC at all, setup will skip this step and you will immediately go to the final phase of the setup process.


Press Next to accept the Typical settings option if you have one of the following situations:
You have a functional DHCP on your network.
You have a computer running Internet Connection Sharing (ICS).
You're in a workgroup environment and do not plan to have any other servers or Active Directory at all, and all other workgroup members are configured in the same manner.
Otherwise select Custom Settings and press Next to customize your network settings.
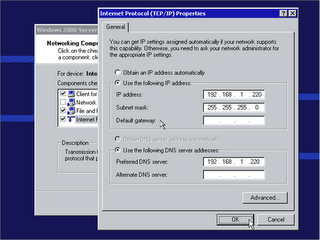
Highlight the TCP/IP selection and press Properties.
In the General tab enter the required information. You must specify the IP address of the computer, and if you don't know what the Subnet Mask entry should be - you can simply place your mouse pointer over the empty area in the Subnet Mask box and click it. The OS will automatically select the value it thinks is good for the IP address you provided.


Lamer note: In the above screenshot I've configured the computer with a valid IP address for MY network, along with the Default Gateway and the address of MY DNS server. Your settings may differ.
If you don't know what these values mean, or if you don't know what to write in them, press cancel and select the Typical Settings option. You can easily change these values later.
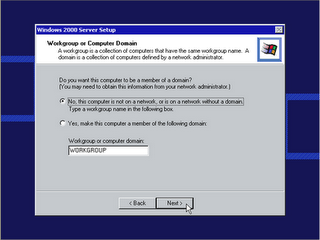
In the Workgroup or Domain window enter the name of your workgroup or domain.
A workgroup is a small group of computers on a network that enables users to work together and does not support centralized administration.
A domain is a logical grouping of computers on a network that has a central security database for storing security information. Centralized security and administration are important for computers in a domain because they enable an administrator to easily manage computers that are geographically distant from each other. A domain is administered as a unit with common rules and procedures. Each domain has a unique name, and each computer within a domain has a unique name.
If you're a stand-alone computer, or if you don't know what to enter, or if you don't have the sufficient rights to join a domain - leave the default entry selected and press Next.


If you want to join a domain (NT 4.0 domain of W2K/2003 Active Directory domain) enter the domain's name in the "Yes, make this computer a member of the following domain" box.


<<--------------------->>

Windows XP


Windows XP

This procedure demonstrates how to install Windows XP Professional. The procedure to install Windows XP home edition is very similar to the professional edition. Since Windows XP Pro is more advanced operating system, it will be used to demonstrate the installation procedure.
The best way to install Windows XP is to do a clean install. It is not difficult to perform a clean installation. Before you perform the installation I recommend that you check
Windows XP Compatibility List to ensure that your hardware is supported by XP. If your hardware is not on the compatibility list you can check your hardware manufactures website to download the drivers for Windows XP. Save all the necessary drivers onto floppy disks or CD before you start the installation.
All versions of Windows XP CD are bootable. In order to boot from CD/DVD-ROM you need to set the boot sequence. Look for the boot sequence under your BIOS setup and make sure that the first boot device is set to CD/DVD-ROM. You can then perform the following steps to install Windows XP:

Step 1 - Start your PC and place your Windows XP CD in your CD/DVD-ROM drive. Your PC should automatically detect the CD and you will get a message saying "Press any key to boot from CD". Soon as computer starts booting from the CD your will get the following screen:


Step 2 - At this stage it will ask you to press F6 if you want to install a third party Raid or SCSI driver. If you are using a an IDE Hard Drive then you do not need to press F6. If you are using a SCSI or SATA Hard drive then you must press F6 otherwise Windows will not detect your Hard Drive during the installation. Please make sure you have the Raid drivers on a floppy disk. Normally the drivers are supplied on a CD which you can copy to a floppy disk ready to be installed. If you are not sure how to do this then please read your motherboard manuals for more information.


Step 3 - Press S to Specify that you want to install additional device.


Step 4 - You will be asked to insert the floppy disk with the Raid or SCSI drivers. Press enter after you have inserted the disk.


Step 5 - You will see a list of Raid drivers for your HDD. Select the correct driver for your device and press enter.


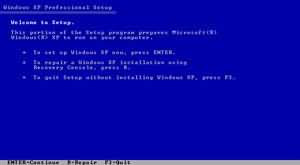
Step 6 - You will then get a Windows XP Professional Setup screen. You have the option to do a new Windows install, Repair previous install or quit. Since we are doing a new install we just press Enter to continue.


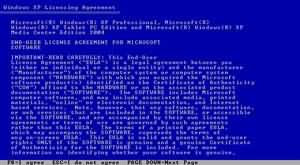
Step 7 - You will be presented with the End User Licensing Agreement. Press F8 to accept and continue


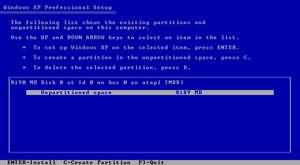
Step 8 - This step is very important. Here we will create the partition where Windows will be installed. If you have a brand new unformatted drive you will get a screen similar to below. In our case the drive size is 8190MB. We can choose to install Windows in this drive without creating a partition, hence use the entire size of the drive. If you wish to do this you can just press enter and Windows will automatically partition and format the drive as one large drive.
However for this demonstration I will create two partition. The first partition will be 6000MB (C: drive) and second partition would be 2180MB (E: drive). By creating two partition we can have one which stores Windows and Applications and the other which stores our data. So in the future if anything goes wrong with our Windows install such as virus or spyware we can re-install Windows on C: drive and our data on E: drive will not be touched. Please note you can choose whatever size partition your like. For example if you have 500GB hard drive you can have two partition of 250GB each.
Press C to create a partition.


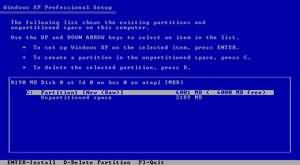
Step 8 - Windows will show the total size of the hard drive and ask you how much you want to allocate for the partition you are about to create. I will choose 6000MB. You will then get the screen below. Notice it shows C: Partition 1 followed by the size 6000 MB. This indicates the partition has been created. We still have an unpartitioned space of 2189MB. Next heighlight the unpartitioned space by pressing down the arrow key. Then press C to create another partition. You will see the total space available for the new partition. Just choose all the space left over, in our case 2180MB.


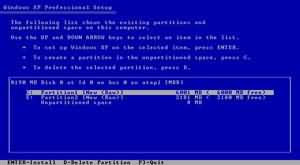
Step 9 - Now you will see both partition listed. Partition 1 (C: Drive) 6000MB and Partition 2 (E: Drive) 2180MB. You will also have 8MB of unpartitioned space. Don't worry about that. Just leave it how its is. Windows normally has some unpartitioned space. You might wonder what happened to D: drive. Windows has automatically allocated D: drive to CD/DVD-ROM.
Select Partition 1 (C: Drive) and press Enter.


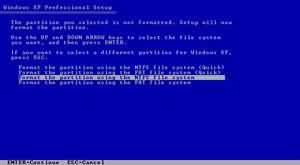
Step 10 - Choose format the partition using NTFS file system.This is the recommended file system. If the hard drive has been formatted before then you can choose quick NTFS format. We chose NTFS because it offers many security features, supports larger drive size, and bigger size files.


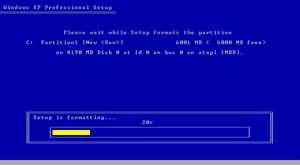
Windows will now start formatting drive C: and start copying setup files as shown on the two images below :


Step 11 - After the setup has completed copying the files the computer will restart. Leave the XP CD in the drive but this time DO NOT press any key when the message "Press any key to boot from CD" is displayed. In few seconds setup will continue. Windows XP Setup wizard will guide you through the setup process of gathering information about your computer.


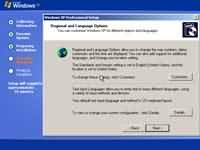
Step 12 - Choose your region and language.


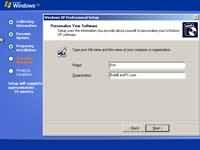
Step 13 - Type in your name and organization.


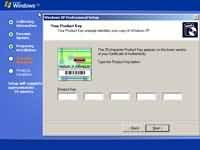
Step 14 - Enter your product key.


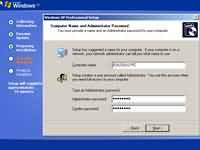
Step 15 - Name the computer, and enter an Administrator password. Don't forget to write down your Administrator password.


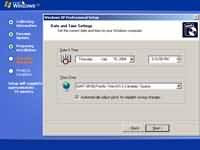
Step 16 - Enter the correct date, time and choose your time zone.


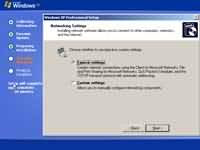
Step 17 - For the network setting choose typical and press next.


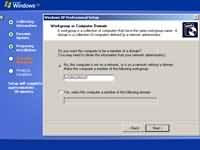
Step 18 - Choose workgroup or domain name. If you are not a member of a domain then leave the default settings and press next. Windows will restart again and adjust the display.


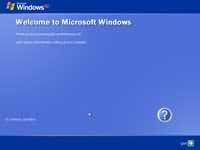
Step 19 - Finally Windows will start and present you with a Welcome screen. Click next to continue.


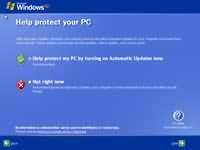
Step 20 - Choose 'help protect my PC by turning on automatic updates now' and press next.


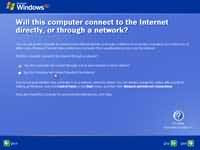
Step 21 - Will this computer connect to the internet directly, or through a network? If you are connected to a router or LAN then choose: 'Yes, this computer will connect through a local area network or home network'. If you have dial up modem choose: 'No, this computer will connect directly to the internet'. Then click Next.


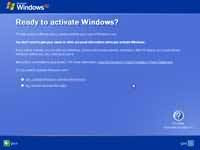
Step 22 - Ready to activate Windows? Choose yes if you wish to active Windows over the internet now. Choose no if you want to activate Windows at a later stage.


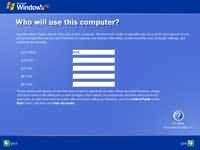
Step 23 - Add users that will sign on to this computer and click next.


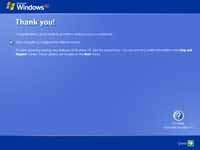
Step 24 - You will get a Thank you screen to confirm setup is complete. Click finish


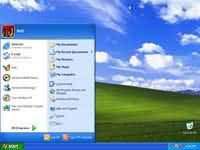
Step 25 - Log in, to your PC for the first time.


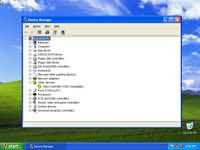
Step 26 - You now need to check the device manager to confirm that all the drivers has been loaded or if there are any conflicts. From the start menu select Start -> Settings -> Control Panel. Click on the System icon and then from the System Properties window select the Hardware tab, then click on Device Manager.


If there are any yellow exclamation mark "!" next to any of the listed device, it means that no drivers or incorrect drivers has been loaded for that device. In our case we have a Video Controller (VGA card) which has no drivers installed.
Your hardware should come with manufacturer supplied drivers. You need to install these drivers using the automatic setup program provided by the manufacturer or you need to manually install these drivers. If you do not have the drivers, check the manufacturers website to download them.
To install a driver manually use the following procedure:
(a) From the device manager double click on the device containing the exclamation mark.
(b) This would open a device properties window.
(c) Click on the Driver tab.
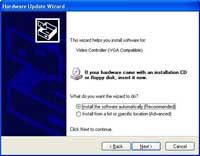
(d) Click Update Driver button. The Wizard for updating device driver pops up as shown below:


You now get two options. The first option provides an automatic search for the required driver. The second option allows you to specify the location of the driver. If you don't know the location of the driver choose the automatic search which would find the required driver from the manufacturer supplied CD or Floppy disk. Windows would install the required driver and may ask you to restart the system for the changes to take affect. Use this procedure to install drivers for all the devices that contain an exclamation mark. Windows is completely setup when there are no more exclamation marks in the device manager.


Check this one out:
What is WINDOWS XP?

Welcome

=] an eXciting WORLD awaits you [=

"dount count your
friends
on a
SUNNY DAY
when the sky is blue
and
laughter is
abundant.
Instead,
wait for the
STORM
when the clouds are dark
and
smiles are
scarce.
When someone
stands
besides
you
and
lift your
SPIRITs high,
then you'll
know who deserves
to be
called
FRIENDS..
"

Followers

Labels